ubuntu 编译安装LNMP+wordpress
发布于2021-03-14 06:03 阅读(1504) 评论(0) 点赞(5) 收藏(5)
一、编译安装LNMP,并安装wordpress。
(一)编译安装NGINX。
1、下载nginx并解压缩。
root@ubuntu ~# wget http://nginx.org/download/nginx-1.18.0.tar.gz
root@ubuntu ~# tar -xf nginx-1.18.0.tar.gz
2、安装依赖包。
root@ubuntu ~# apt install -y gcc libgd-dev libgeoip-dev libpcre3 libpcre3-dev libssl-dev openssl
3、开始编译安装nginx。
root@ubuntu ~# cd nginx-1.18.0/
root@ubuntu ~/nginx-1.18.0# ./configure --prefix=/apps/nginx --user=nginx  --group=nginx  --with-http_ssl_module
--with-http_v2_module  --with-http_realip_module  --with-http_stub_status_module  --with-http_gzip_static_module
--with-pcre  --with-stream  --with-stream_ssl_module  --with-stream_realip_module
root@ubuntu ~/nginx-1.18.0# make -j 4
root@ubuntu ~/nginx-1.18.0# make install
4、创建nginx用户和组,修改/apps/nginx目录所属用户和所属组。
root@ubuntu ~/nginx-1.18.0# addgroup --gid 2000 nginx
Adding group `nginx' (GID 2000) ...
Done.
root@ubuntu ~/nginx-1.18.0# useradd -m -r -s /bin/bash -u 2000 -g 2000 nginx
root@ubuntu ~/nginx-1.18.0# chown nginx.nginx -R /apps/nginx/
5、修改nginx配置文件,http段改为下面内容。
root@ubuntu /lnmp# vim /apps/nginx/conf/nginx.conf
http {
    include       mime.types;
    default_type  application/octet-stream;
    sendfile        on;
    keepalive_timeout  65;
    server {
        listen       80;
        server_name  localhost;
        location / {
            root   /apps/nginx/html;
            index  index.html index.htm index.php;
        }

        location ~ \.php$ {
                 root /apps/nginx/html;
                 fastcgi_pass 127.0.0.1:9000;
                 fastcgi_index index.php;
                 fastcgi_param SCRIPT_FILENAME $document_root$fastcgi_script_name;
                 include fastcgi_params;
}

        error_page   500 502 503 504  /50x.html;
        location = /50x.html {
            root   html;
        }
6、nginx设为服务并启动。
root@ubuntu ~# vim /lib/systemd/system/nginx.service
[Unit]
Description=nginx service
After=network.target

[Service]
Type=forking
ExecStart=/apps/nginx/sbin/nginx
ExecReload=/apps/nginx/sbin/nginx -s reload
ExecStop=/apps/nginx/sbin/nginx -s quit
PrivateTmp=true

[Install]
WantedBy=multi-user.target

root@ubuntu ~#systemctl enable --now nginx
7、访问nginx页面。
root@ubuntu /apps/nginx/html# echo nginx > /apps/nginx/html/index.html
root@ubuntu /apps/nginx/html# curl 10.0.0.135
nginx
(二)编译安装php-fpm。
1、下载并解压缩php软件包。
root@ubuntu /lnmp# wget https://www.php.net/distributions/php-7.4.14.tar.xz
root@ubuntu /lnmp# tar -xf php-7.4.14.tar.xz
2、安装依赖包。
root@ubuntu /lnmp# apt install -y libcurl4-openssl-dev libgd-dev libwebp-dev libpng++-dev libfreetype6-dev libghc-zlib-dev libmcrypt-dev libxml++2.6-dev libssl-dev libbz2-dev libtoos libsqlite3-dev libxslt-dev libonig-dev
3、编译安装php。
root@ubuntu /lnmp/php-7.4.14# ./configure --prefix=/apps/php --enable-fpm --with-fpm-user=nginx --with-fpm-group=nginx \
--with-pear --with-curl --with-png-dir --with-freetype-dir --with-iconv --with-mhash --with-zlib --with-xmlrpc --with-xsl \
--with-openssl --with-mysqli --with-pdo-mysql --disable-debug --enable-zip --enable-sockets --enable-soap --enable-inline-optimization \
--enable-xml --enable-ftp --enable-exif --enable-wddx --enable-bcmath --enable-calendar --enable-shmop --enable-dba --enable-sysvsem \
--enable-sysvshm --enable-sysvmsg --enable-mbstring

root@ubuntu /lnmp/php-7.4.14# make -j 4 && make install
4、修改php配置文件。
root@ubuntu ~# cd /apps/php/etc/php-fpm.d/
root@ubuntu /apps/php/etc/php-fpm.d# cp www.conf.default www.conf
root@ubuntu /apps/php/etc/php-fpm.d# cp /lnmp/php-7.4.14/php.ini-production /apps/php/etc/php.ini
root@ubuntu /apps/php/etc/php-fpm.d# mkdir /apps/php/log/
root@ubuntu /apps/php/etc/php-fpm.d# cd ..
root@ubuntu /apps/php/etc# cp php-fpm.conf.default php-fpm.conf
5、php设为服务并启动。
root@ubuntu ~# vim /lib/systemd/system/php-fpm.service
[Unit]
Description=The PHP FastCGI Process Manager
After=syslog.target network.target

[Service]
Type=simple
PIDFile=/run/php-fpm.pid
ExecStart=/apps/php/sbin/php-fpm --nodaemonize  -c /apps/php/etc/php.ini
ExecReload=/bin/kill -USR2 $MAINPID
ExecStop=/bin/kill -SIGINT $MAINPID

[Install]
WantedBy=multi-user.target

root@ubuntu ~# systemctl enable --now php-fpm
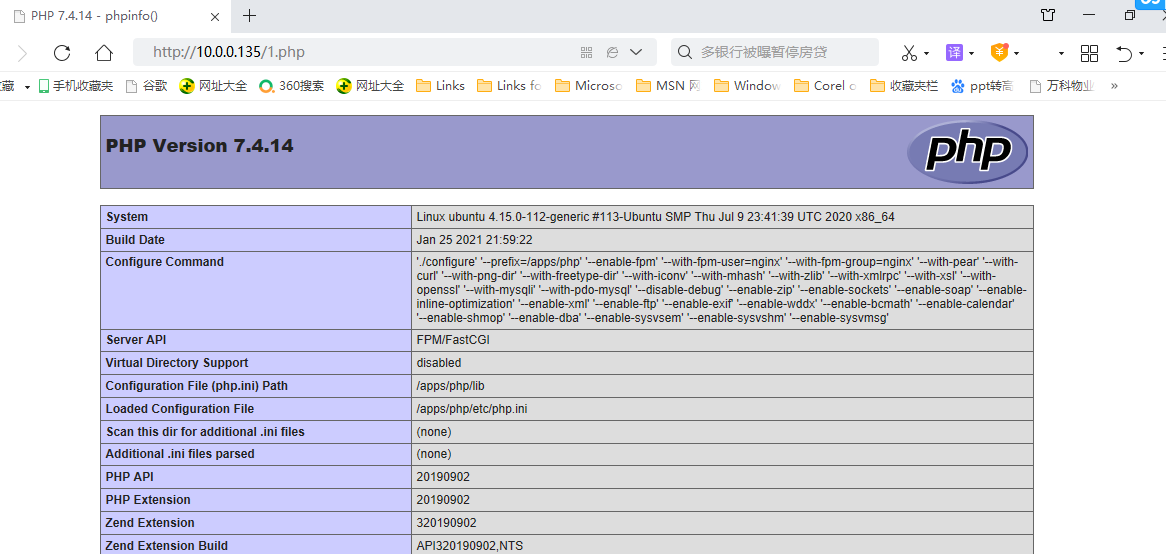
6、创建php测试页面,使用浏览器测试php页能否显示。
root@ubuntu /lnmp# vim /apps/nginx/html/1.php
<?php
        phpinfo();
?>

(三)编译安装mysql8.0.23。
1、安装依赖包。
root@ubuntu /lnmp# apt install build-essential cmake bison libncurses5-dev libssl-dev pkg-config
2、下载mysql8.0.23,并解压缩。
root@ubuntu:/lnmp# wget https://dev.mysql.com/get/Downloads/MySQL-8.0/mysql-boost-8.0.23.tar.gz
root@ubuntu:/lnmp# tar -xf mysql-8.0.23-linux-glibc2.12-x86_64.tar.xz
root@ubuntu:/lnmp# cd mysql-8.0.23-linux-glibc2.12-x86_64/
3、编译安装mysql。
root@ubuntu /lnmp# cmake -DCMAKE_INSTALL_PREFIX=/apps/mysql -DMYSQL_DATADIR=/data/mysql -DWITH_BOOST=boost -DFORCE_INSOURCE_BUILD=ON
root@ubuntu /lnmp# make -j 4
root@ubuntu /lnmp# make install
4、创建mysql账号,设置所属用户和所属组。
root@ubuntu /apps/mysql/bin# useradd mysql -s /sbin/nologin
root@ubuntu /apps/mysql/bin# mkdir -p /data/mysql /var/lib/mysql
root@ubuntu /apps/mysql/bin# chown -R mysql.mysql /data /var/lib/mysql /apps/mysql
5、添加PATH路径。
root@ubuntu ~# echo 'PATH=/apps/mysql/bin:$PATH' > /etc/profile.d/mysql.sh
root@ubuntu ~# . /etc/profile.d/mysql.sh
6、创建/etc/my.cnf配置文件。
root@ubuntu ~# vim /etc/my.cnf
[mysqld]
socket=/data/mysql/mysql.sock
user=mysql
symbolic-links=0
datadir=/data/mysql
innodb_file_per_table=1 max_connections=10000
[client]
port=3306
socket=/data/mysql/mysql.sock
[mysqld_safe]
log-error=/var/log/mysqld.log
pid-file=/tmp/mysql.sock
7、初始化数据库。
root@ubuntu /apps/mysql/bin# /apps/mysql/bin/mysqld --defaults-file=/etc/my.cnf  --initialize --user=mysql --basedir=/apps/mysql --datadir=/data/mysql
#初始化完成后会生成root初始密码,使用此密码登录数据库后必须更改密码才能使用数据库。
8、启动mysql服务。
root@ubuntu /apps/mysql/bin# cp /apps/mysql/support-files/mysql.server /etc/init.d/mysqld
root@ubuntu /apps/mysql/bin# chmod a+x /etc/init.d/mysqld
root@ubuntu /apps/mysql/bin# update-rc.d mysqld defaults
root@ubuntu /apps/mysql/bin# systemctl start mysqld
9、使用初始密码登录,修改mysql的root账号密码。
root@ubuntu ~# mysql -uroot -p"fPnEVsniN7(i"
mysql: [Warning] Using a password on the command line interface can be insecure.
Welcome to the MySQL monitor.  Commands end with ; or \g.
Your MySQL connection id is 8
Server version: 8.0.23 Source distribution

Copyright (c) 2000, 2021, Oracle and/or its affiliates.

Oracle is a registered trademark of Oracle Corporation and/or its
affiliates. Other names may be trademarks of their respective
owners.

Type 'help;' or '\h' for help. Type '\c' to clear the current input statement.

mysql> alter user 'root'@'localhost' identified by "123456";
Query OK, 0 rows affected (0.02 sec)
(四)安装wordpress。
1、创建wordpress数据库和账号、密码
root@ubuntu /lnmp# mysql -uroot -p123456
mysql: [Warning] Using a password on the command line interface can be insecure.
Welcome to the MySQL monitor.  Commands end with ; or \g.
Your MySQL connection id is 9
Server version: 8.0.23 Source distribution

Copyright (c) 2000, 2021, Oracle and/or its affiliates.

Oracle is a registered trademark of Oracle Corporation and/or its
affiliates. Other names may be trademarks of their respective
owners.

Type 'help;' or '\h' for help. Type '\c' to clear the current input statement.

mysql> CREATE DATABASE wordpress;
Query OK, 1 row affected (0.07 sec)

mysql> CREATE USER "wordpress"@"10.0.0.%" IDENTIFIED BY "123456";
Query OK, 0 rows affected (0.03 sec)

mysql> GRANT ALL PRIVILEGES ON wordpress.* TO "wordpress"@"10.0.0.%";
Query OK, 0 rows affected (0.02 sec)

mysql> FLUSH PRIVILEGES;
Query OK, 0 rows affected (0.00 sec)

mysql> show databases;
+--------------------+
| Database           |
+--------------------+
| information_schema |
| mysql              |
| performance_schema |
| sys                |
| wordpress          |
+--------------------+
5 rows in set (0.03 sec)
2、下载wordpress,解压缩到/apps/nginx/html目录,设置权限。
root@ubuntu /apps/nginx/html# tar -xf wordpress-5.6-zh_CN.tar.gz
root@ubuntu /apps/nginx/html# chown nginx.nginx -R /apps/nginx/html/wordpress
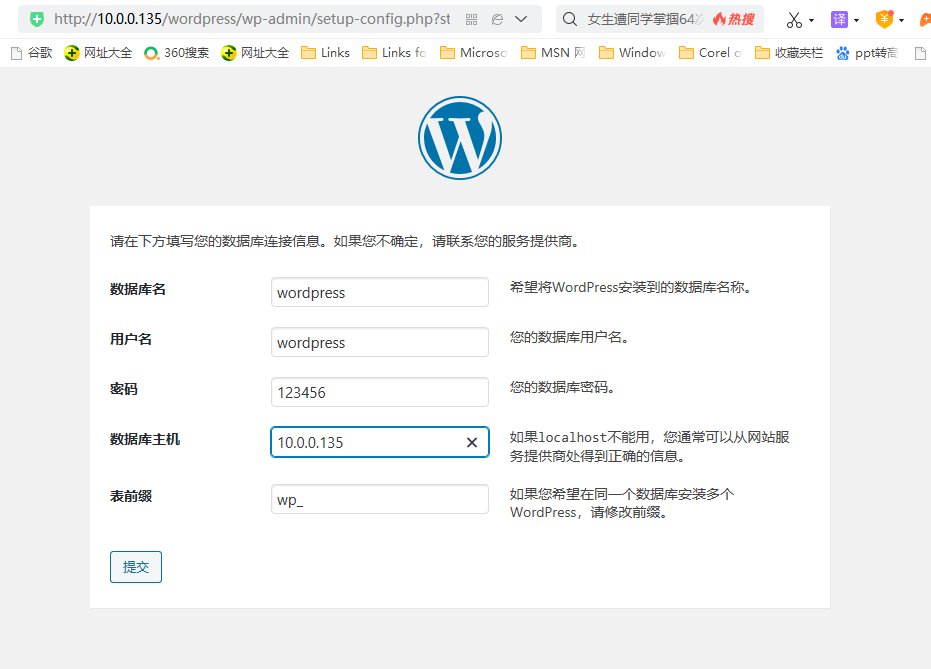
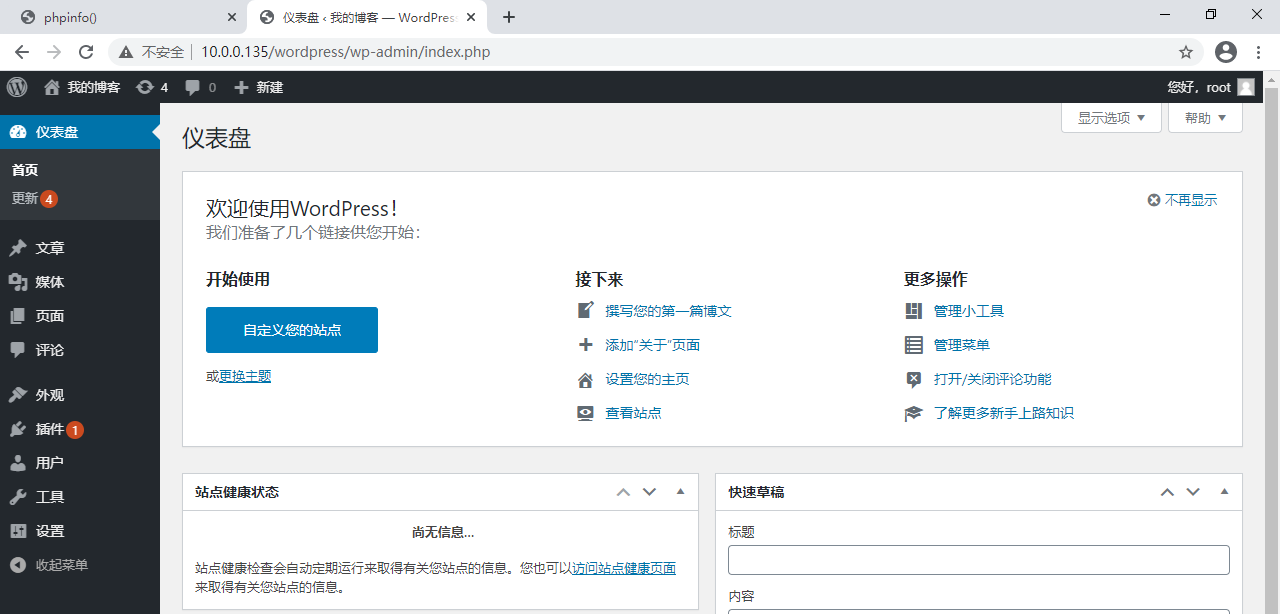
3、访问wordpress页面进行初始化。


二、配置虚拟主机,www.x.com域名实现首页访问,admin.x.com域名实现wordpress的后台访问。
1、本实验在上例的基础上完成。
2、修改windows的host文件,添加下面内容。
10.0.0.135 www.x.com
10.0.0.135 admin.x.com
3、修改nginx配置文件,在http段下添加虚拟主机配置,重启nginx服务。
server {
        listen 80;
        server_name www.x.com;
        location / {
                root /apps/nginx/html/wordpress;

                index index.html index.php; }
        location ~ \.php$ {
                 root /apps/nginx/html/wordpress;
                 fastcgi_pass 127.0.0.1:9000;
                 fastcgi_index index.php;
                 fastcgi_param SCRIPT_FILENAME $document_root$fastcgi_script_name;
                 include fastcgi_params;
        }
}

server {
        listen 80;
        server_name admin.x.com;
        location / {
                root /apps/nginx/html/wordpress/wp-admin;

                index index.html index.php; }
        location ~ \.php$ {
                 root /apps/nginx/html/wordpress/wp-admin;
                 fastcgi_pass 127.0.0.1:9000;
                 fastcgi_index index.php;
                 fastcgi_param SCRIPT_FILENAME $document_root$fastcgi_script_name;
                 include fastcgi_params;
        }
}
root@ubuntu ~# systemctl restart nginx
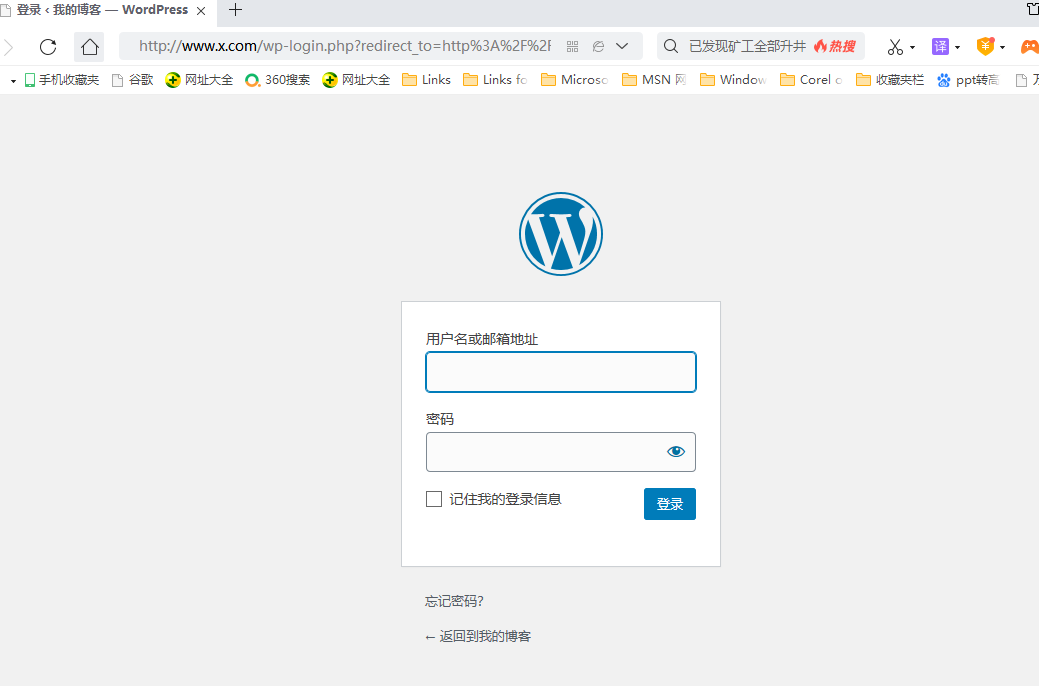
4、使用域名访问wordpress。
成功访问后需要先登录管理后台 仪表盘——>设置——>常规——>WordPress地址(URL) 和 站点地址(URL)改为http://www.x.com,否则后续访问地址会变成ip地址。

原文链接:https://www.cnblogs.com/lele3721/p/14323855.html
所属网站分类: 技术文章 > 博客
作者:php程序员
链接:http://www.phpheidong.com/blog/article/2902/7b174f83db0984768664/
来源:php黑洞网
任何形式的转载都请注明出处,如有侵权 一经发现 必将追究其法律责任
昵称:
评论内容:(最多支持255个字符)
---无人问津也好,技不如人也罢,你都要试着安静下来,去做自己该做的事,而不是让内心的烦躁、焦虑,坏掉你本来就不多的热情和定力